Lois Leonard explains how to kindle the curiosity and inspire the inventiveness of Da Vinci in your class...
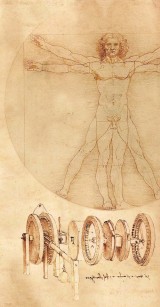
We all know that Leonardo da Vinci was a genius who broke boundaries in science, maths, engineering and arts. We also know that Leonardo didn’t see ‘subject areas’; he made careful observations of the natural and made world and used this to inspire all of his works.
As such, mimicking Leonardo may sound a daunting task, but teaching pupils how to carefully observe and analyse will enable them to learn more about the world around them, to gather inspiration and become truly creative.
Leonardo made first-hand investigations, and children will need to do the same. Make sure that they can get their hands on real objects so that they can use all of their senses. They will also need appropriate tools to peel, chop, pound, rub and generally ‘dissect’ the objects, and, of course, appropriate methods to record their findings.
The trick with these activities is to ‘let go’ of pre-planned outcomes and focus on the process of observation and investigation. Encourage children to consider and explore aspects that may not be obvious in the first encounter. They will arrive at outcomes that may never have occurred to you, or anyone else before!
Nature is a very clever designer – many plants and trees spread their seeds by providing them with wings. The children can attempt to discover some theories of flight by investigating dandelion, ash and sycamore seeds. Since these seeds fly, it is a good idea to throw some around or blow them with a fan to discover how they move in flight. Ask the children what the flight patterns look like and why seeds need to fly.
They should look very carefully at the seeds from the top, side and at an angle, identify different parts of each seed and try to work out what each part does. They can then draw or photograph the seeds, annotating each part and describing how and why the seed flies.
Finally, give them paper, card, cocktail sticks, tissue paper, strong thread, glue and tape, and get them to make a working seed. They need to look at how the different parts of a seed can be modelled and make improvements to evolve their initial ideas into working models.
Young and old alike love playing with bubbles. The children will be interested to know that scientists at NASA played with bubbles to develop structures which could be transported into space to create living accommodation for astronauts.
Get the children to use wire to create 2D shapes and dip them in a soap solution of 1/2 cup washing up liquid, two tablespoons glycerine and two cups water. They should blow them gently and record what they see – the shapes, structure, colours, texture and movement.
Next they can repeat the investigation with 3D shapes. What do they notice now? What are the changes to shape, structure, colour texture and movement? It’s also possible to investigate bubbles in different scales. Big bubbles made with large loops of rope move in quite a different way to smaller bubbles. Ask the children to look at tiny bubble forms through a microscope.
After they’ve carefully recorded their investigations through drawing, photography or even film, the children can use the features they observed in their investigation as inspiration for a new creation – e.g. art, sculpture, architecture, jewellery, or creative writing.
 Nature is also very good at making tall and thin structures which withstand the wind and do not collapse when they are covered in rain or snow.
The children should collect a range of plants with tall, strong stems to investigate: bamboo, cow parsley and rushes would make interesting subjects. They need to look carefully at the stem and record what they see, then cut through the stem lengthways and widthways with a sharp knife and record what they see again.
After that, the samples can be placed under a microscope to reveal the structure of the stems. The children can add their observations to their other records.
Next, get the children to use paper and glue to recreate the structures they’ve observed. Devise an experiment to find out how strong their structures are. They can also consider different applications for their structures and see what they can create if they combine lots of their models into one big structure.
Leonardo was often thwarted in his attempts to build what he had designed as the materials he required did not yet exist. Today, however, scientists can develop new materials with just the right properties for the job in hand. Sometimes they invent new materials with no use in mind.
 Ask the children to collect a range of unusual materials, find out their properties and suggest possible uses for them.
Try
• Lenticular polypropylene
• Colour-changing beads
• Holographic card
• Thermochromatic pigments
• Thermochromatic sheet
• Dissolving film
They should experiment with the materials – try bending, cutting, heating, cooling, wetting, placing in sunlight etc. – to find out how they react. They can use the internet and library to widen their research.
Brainstorm scenarios that the material could be used in. For example, if the material is affected by temperature, get the children to think of different situations where temperature change is important. They can then use these scenarios to come up with uses for the material, explaining the purpose, function and design of their new product via annotated drawings, writing and discussion.
 Learning how to look at everyday objects in unusual ways is a great method for developing inspiring designs. The trick is to see past the whole object and focus on abstracted features such as its textures, lines, shapes, colours and patterns.
Ask the children to collect a range of everyday objects: a toothbrush; a tin opener; an iron; a bicycle, for example. They should look carefully at each object using a magnifying glass or a view finder (a small square or rectangle cut from the centre of a piece of card) – encourage them to try to see past the whole object and focus only on its visual features.
They should then record what they see – a digital camera is the perfect way to capture accurate close-ups and quickly build a library of abstract images. The digital images can be used to create montages – the children can use publishing software to arrange the images in a simple grid to create striking posters or reference sheets. Next, they can choose their favourite image, grab a pencil and paper and start sketching. Encourage them to play with the image – distort it, repeat it, rotate it, exaggerate the colours and lines. They shouldn’t worry about the accuracy of their drawing, just draw, and can focus on the sketches they like, ignoring the ones that don’t work so well. These sketches can then inspire them to create new and unconventional designs: a building, a car, wallpaper, a hat, or whatever takes their fancy.
Cornwall Learning offers a wider range of services and support for schools and education settings throughout Cornwall. This article is based on teaching resources produced with Cornwall Learning, which are available through the Design and Making Centre catalogue. Please contact 01209 615 065 for further information.
Use scaffolding to wean children off high levels of TA support
Ace-Kitchen-Manager
How to be a singing school
Ace-Music
